
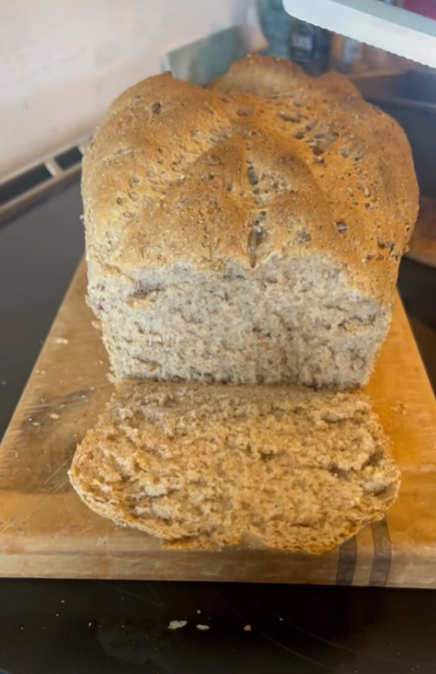
easy sourdough bread recipe
Experience the joy of baking with this easy Sourdough Bread Recipe! Perfect for beginners and seasoned bakers alike, this recipe guides you through creating a deliciously crusty loaf with a delightful tang. Made with just a few simple ingredients
- Total Time: 1 hour 10 minutes
Ingredients
- 2 cups warm water
- 1 tablespoon active dry yeast
- 1 cup mature starter, room temperature
- 2 teaspoons salt
- 2 teaspoons oil
- 3 cups whole-wheat flour (or combination of whole grains, bulgur, seeds, etc.)
- 1 cup white flour
Instructions
1. Prepare the Starter
Allow the starter to come to room temperature before beginning the process to ensure optimal fermentation activity.
2. Bloom the Yeast
Pour the warm water into a clean mixing bowl. Evenly sprinkle the yeast over the surface and allow it to stand undisturbed for approximately 10 minutes, or until fully bloomed and a foamy layer forms on top.
3. Incorporate the Starter
Add the room-temperature starter to the bloomed yeast mixture and stir until well combined.
4. Form the Dough
Add the flour(s), salt, and oil to the bowl. Mix until the dough begins to come together. Gradually adjust the amount of flour as needed, aiming for a smooth, cohesive dough that pulls away from the sides of the bowl without being overly sticky.
5. Kneading
Using a stand mixer fitted with a dough hook: knead for approximately 2 minutes on medium speed.
By hand: knead on a lightly floured surface for about 8–10 minutes, until the dough becomes smooth, elastic, and supple.
6. First Proofing (Bulk Fermentation)
Transfer the dough to a lightly oiled bowl, turning once to coat the surface. Cover with a clean towel or lightly oiled plastic wrap. Allow to proof in a warm, draft-free area for 1½ to 2 hours, or until doubled in volume.
7. Reserve Starter for Next Batch
Remove and reserve 1 cup of dough. Store appropriately to use as a starter for your next batch.
8. Shape the Dough
Gently deflate the remaining dough, then knead briefly to redistribute the gas. Shape as desired, then place in a lightly oiled baking pan.
9. Second Proofing
Cover and allow the dough to proof again for 1½ to 2 hours, or until doubled in size.
10. Bake
Preheat the oven to 400°F (200°C). Bake for approximately 30 minutes, or until the crust is golden brown and the loaf sounds hollow when tapped on the bottom.
Notes
- Don’t be afraid. Bread is not hard to make.
- The key is getting the consistency right. This is from the proportion of liquid to flour. It should start to look like bread dough as you add the flour. If it is crumbly, add more liquid. If it is wet and sticky, add more flour until it looks smooth. When the proportion is right, the dough sticks to itself and not your bowl.
- Kneading does help. Apparently, there is some science to bonding the flour together.
- It won’t rise well if it is too cold. If the room is cold, heat your oven to 200 degrees F and TURN IT OFF. Put the bread in the warmed oven to rise.
- Before you start, make sure you have 4 hours. The actual work takes about 15 minutes, but it needs 4 hours to rise. Don’t rush.
- The water needs to feel hot to your hand. To put it in perspective: your body temperature should be around 98 degrees F; the water should be around 105-110 F for yeast to work, so it should be warmer than your skin.
- Prep Time: 25 mins
- Cook Time: 45 mins
- Category: breads
- Cuisine: AMERICAN
Nutrition
- Calories: 240
- Sugar: 8 g
- Sodium: 180 mg
- Fat: 8 g
- Carbohydrates: 40 g
- Protein: 8 g
:
🔥 Why You’ll Love This Recipe
✅ Crusty on the outside, soft and airy inside
✅ Simple ingredients—flour, water, salt, and starter
✅ Beginner-friendly method
✅ No commercial yeast needed
✅ Naturally fermented for better flavor
✅ Perfect for sandwiches, toast, or dipping
🧠 Pro Tips
- Use an active, bubbly sourdough starter for best results.
- Allow enough time for fermentation—don’t rush the process.
- Stretch and fold the dough instead of kneading.
- Use a Dutch oven for a crispy, bakery-style crust.
- Let the bread cool completely before slicing.
🔁 Variations & Add-Ins
- Whole Wheat: Replace part of the flour with whole wheat flour.
- Seeded Loaf: Add sunflower seeds, sesame seeds, or flaxseeds.
- Herb Bread: Mix in rosemary, thyme, or garlic.
- Cheesy: Add shredded cheddar or Parmesan.
- Sweet Twist: Add dried fruits like raisins or cranberries.
❄️ Storage & Reheating
- Room Temp: Store in a paper bag or bread box for up to 3 days.
- Freezer: Freeze sliced bread for up to 3 months.
- Reheat: Toast slices or warm in the oven to refresh the crust.
🍞 What to Serve With Easy Sourdough Bread
- Butter, jam, or honey
- Soups and stews
- Sandwich fillings
- Olive oil and balsamic vinegar
- Cheese and charcuterie boards
Ready to take your baking to the next level? Try this Sourdough Bread Recipe today and enjoy the delicious rewards of your hard work! For more delightful recipes, check out our collection of bread recipes and discover new favorites to bake at home!
Ready to learn this recipe and more?
Were you able to follow that recipe? Print or download this copy now and don’t forget to share it with your friends.
I would love to cook together with you live! I have now opened my online cooking lessons for booking.
Click here to find out more and book your lessons!
If you enjoyed this recipe, you might also like this homemade chocolate vanilla liqueur, baked spaghetti recipe, or homemade croutons.